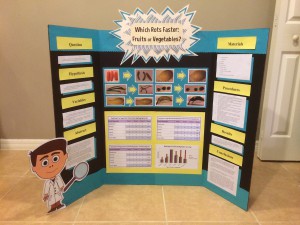
 In my previous post, I discussed how our middle school-aged son was tasked to complete his science project like an actual project. Along the way to the completion of the final project, he had to accomplish a series of tasks with a series of completion dates throughout the fall term. At the end of the first stage of the project, he ended up with a prototype of what the larger science project display would look like, were he one of the five students in his class chosen to continue to the school-wide science fair.
Steps toward a successful science project
In order to get to the prototype, our son had to complete the following tasks (according to a sheet provided by Science Buddies):
- Topic selection: Choose a topic that you would like to work on for your science project
- Pose a specific question that you will be answering in your science project
- Create a research plan on how you plan to answer the question you posed
- Research your sources, and create a bibliography of sources that you will use to answer the research question
- Write a research paper to provide background information about the topic that you have chosen, including the history of experiments on this topic, definitions of important words and concepts, answers to background research questions, and any mathematical formulas that you might need to use during your experimentation
- Create a list of variables and a hypothesis that you will use to conduct your experiment
- Write a detailed list of materials you will need and procedures you will follow as you conduct your experiment
- Conduct the experiment, using a minimum of three trials (runs) of the experiment
- Analyze your data and create graphs and/or charts to represent the data
- Using the data analysis and graphs, write a summary of what you have discovered
- Compose a conclusion indicating what you have discovered through your experimentation
- Write a final report that collects all of the information you have worked on above, including an abstract of your project with the final report
- Put your project onto a prototype display board to show how it would be displayed if you placed it on a larger tri-fold or bristol board
- Hand in your completed science project for consideration at the school science fair.
Each of these tasks was given a firm due date. In some cases, only proof of experimentation was needed (a few photographs of what you had accomplished). Basically, these steps were created to make sure that students got done what they needed to in time for that final completion date later in the fall. In total, the different tasks were spread out over the period of three months.
Science project success
In the end, my son’s science project was one of the five science projects in his classroom selected to enter the school-wide science fair. As such, he was told to take what he had put onto his smaller prototype display (as per the previous post) and create a full-sized version of that display. That final display can be seen in the photograph above.
And after the school-wide science fair, his project was selected to represent his school at the county-wide science fair! So working the science project like an actual project, with project deadlines, milestones, and deliverables, turned out to work well in his favor.
Wish him and his schoolmates luck at the county-wide fair!


